Broker Extra Help
Broker Extra Help
Step by Step Guide
Step 1 - How to set up your Brella account & profile

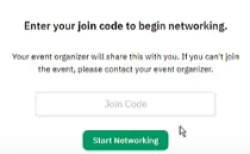
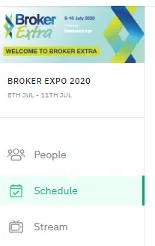
The link to our virtual event platform and your unique join code will be sent to you and you will be met by this page once you click on your event link. Please note that your unique join code can only be used by yourself.
You can use your social media accounts to set up your profile, if you do so, your profile picture and information will be pulled automatically. If a pop up appears that does not allow you to register using your social accounts, this will be because your cookies have been disabled, please enable cookies in order to register using your social accounts. If this is not possible, you can register by clicking on “Create Brella account”.
Once you have accepted the user agreement, click join the event and enter your join code. You will only have to do this the first time you log on.
Once you have successfully entered your code you will see a screen like this:
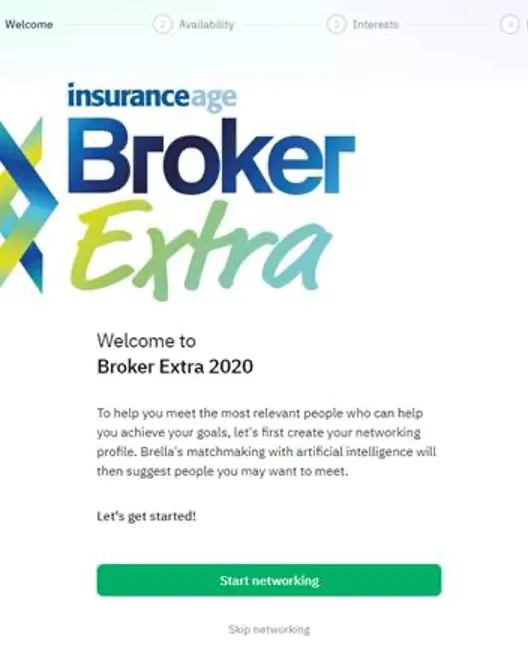
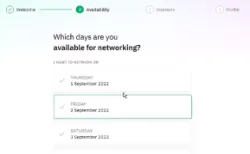
Click on the start networking button and select the days you’ll be attending the event.
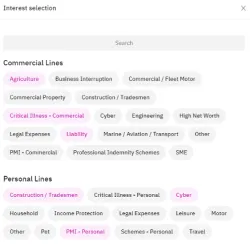
You will then be asked to select your interests from the set list.Please select as many as are relevant to you. The more accurate your selection, the more accurate our AI algorithm will be. There is no set limit to how many you are able to select.
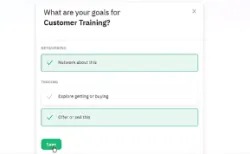
When you chosen your interest, you can then set your objectives for the event, to network, buy or sell.
Then, you’ll write a small introduction about yourself and you are all set to start networking.
If you want to edit your profile - search your name and click on it. Then click edit my profile, where you can change your introduction, edit your interests or restart the join process.
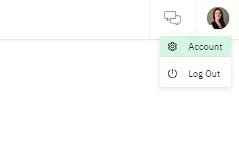
To edit your account click on your profile picture in the top right hand corner and click account. - you can then add social links, add your picture and update your details.
Here you will be able to update your email, company name, title and add in your social media links. Once you are finished, click save changes.
Step 2 - How to Network
Through its AI algorithm, our virtual event platform Brella will match you with people who have similar interests and objectives.
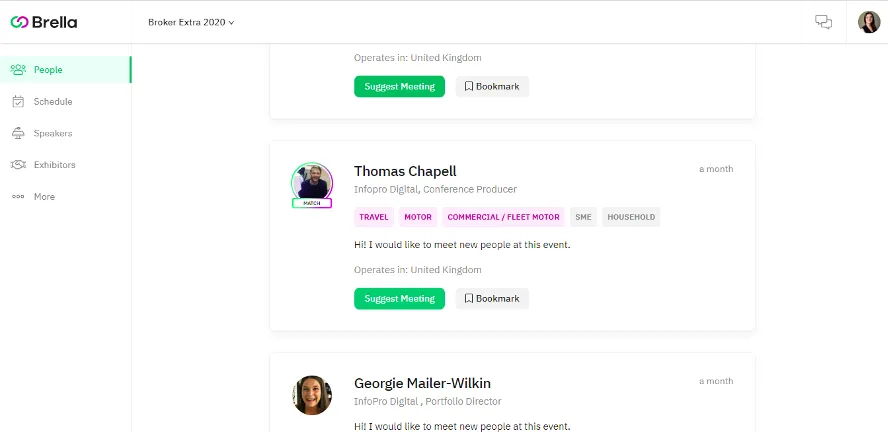
You are also able to search by name, title, interest type etc.
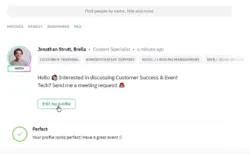
When you see a profile that interests you click “meeting request” – this brings up their profile and shows you their and your availability.
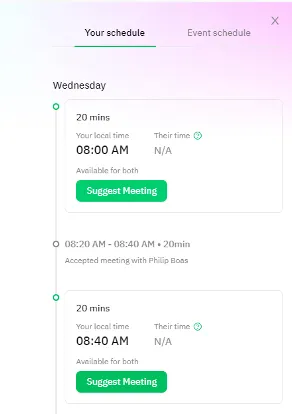
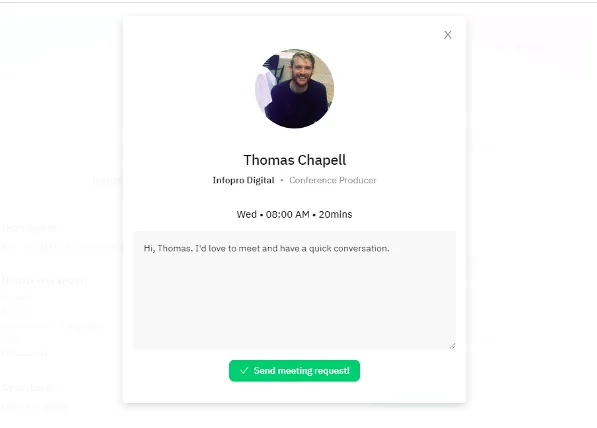
Click on the ideal meeting time, add a personal message and send the meeting request.
Meeting requests are received in your virtual platform inbox as well as sent to your email.
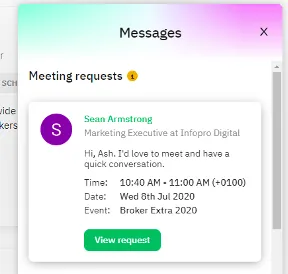
The meeting request is viewed in the virtual platform and you can either accept, decline or suggest a new time.
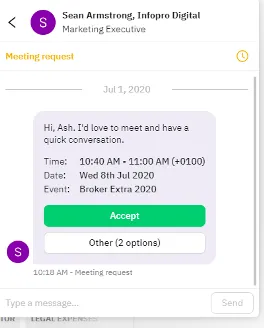
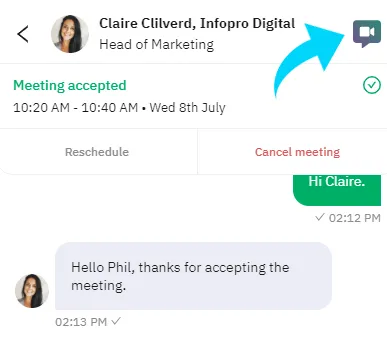
Once a meeting is accepted you are able to chat to each other through the chat function in the meeting request.
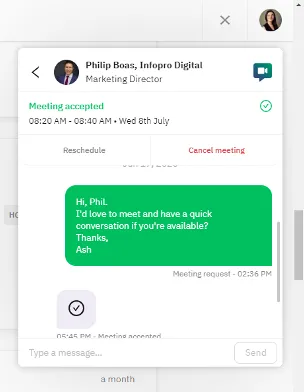
At the time of the meeting, you hit the video call button within the meeting request and start your face to face meeting.
Step 3 – How to watch content, ask questions, filter the agenda, bookmark sessions
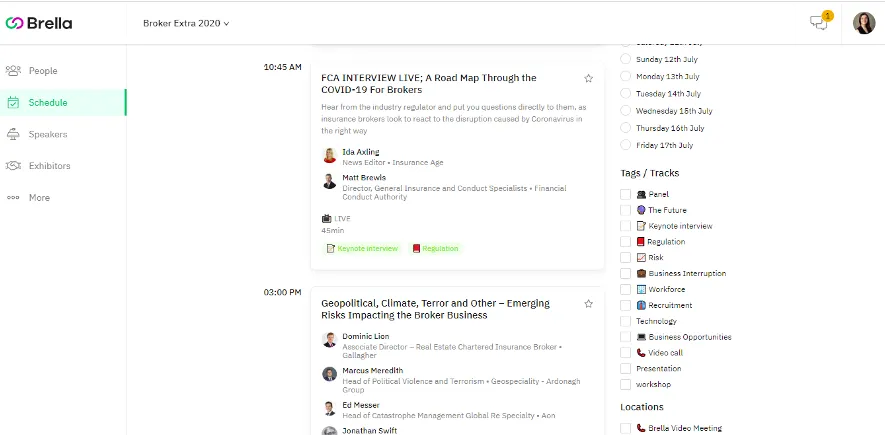
To see the agenda and access the sessions, click on “schedule” on the side bar.
You will then be able to see the full agenda. To see information about the session, just click on the session and a full description of the session will appear. To watch the session at the designated time if it is live, or at a time convenient to you if it is on demand, click on the session tile and the session will appear through a streaming window that will automatically open up.
In live sessions, you will be to ask the speaker questions through the chat bar to the side of the video window. Some sessions will also include live polls.
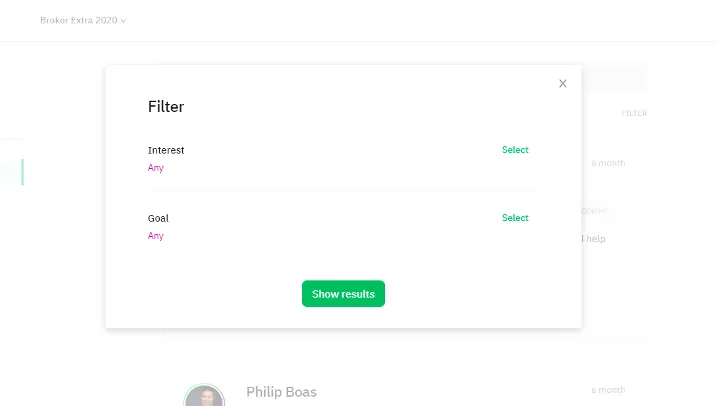
You can filter through the navigation bar by day and by session time as well as bookmarking sessions that you want to make sure you don’t miss.

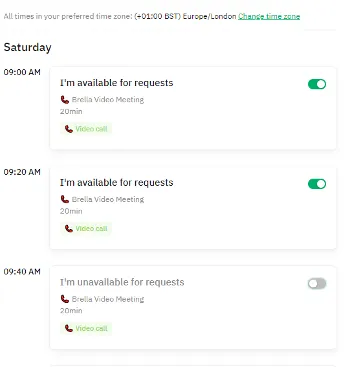
You can also amend your availability for meetings by filtering through networking availability and making yourself unavailable or available by meeting time slot.
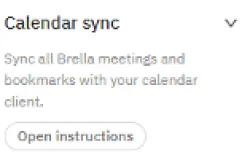
You can sync meetings and bookmarked sessions to your calendar by clicking on the sync calendar tab and following the instructions.
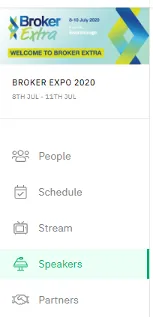
You can also search all of the speakers by clicking on speakers on the side bar.

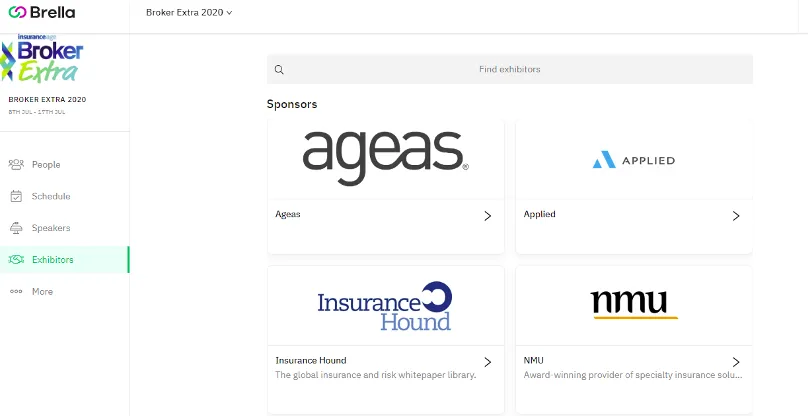
Step 4 – Visit the Exhibitors

Click on the exhibitors tab tab on the side bar.
Click on an exhibitor and you will be taken into their booth where you can set up meetings, live chat, download whitepapers, find out more about the company and what they have to offer.